Let’s Get Started
Whether its answering design questions to creating a design for custom Assembled Kitchen Cabinets, we can help. Our design services are free and here to help get you the kitchen of your dreams.
Your Free Custom Kitchen Design Includes:

Drawing Layout

3D Model Views

Itemized Quote
To start your free custom kitchen design, follow the Design Guide directions below. For any design and cabinet questions, feel free to email us at design@quickshipkitchens.com or call 888-784-0322.
Assembled Kitchen Cabinets Design Guide
Our kitchen design process is broken into the following 4 sections.
Section 1 – Sketch your kitchen layout and take measurements
Section 2 – Take pictures of your current kitchen layout
Section 3 – Tell us about your kitchen and what you want
Section 4 – Upload and submit your photos and drawings
We will guide you through each of the sections helping to make this process quick and easy. And don’t worry we are here to help. Just send us an email or give us a call if you have any questions and we can guide you through it.
Section 1 – Sketching Layout and Taking Measurements
Step 1 – Get a pencil, tape measure, and a piece of plain white paper or print and use the printable graph paper provided below.
Printable Graph Paper for Kitchen Drawing
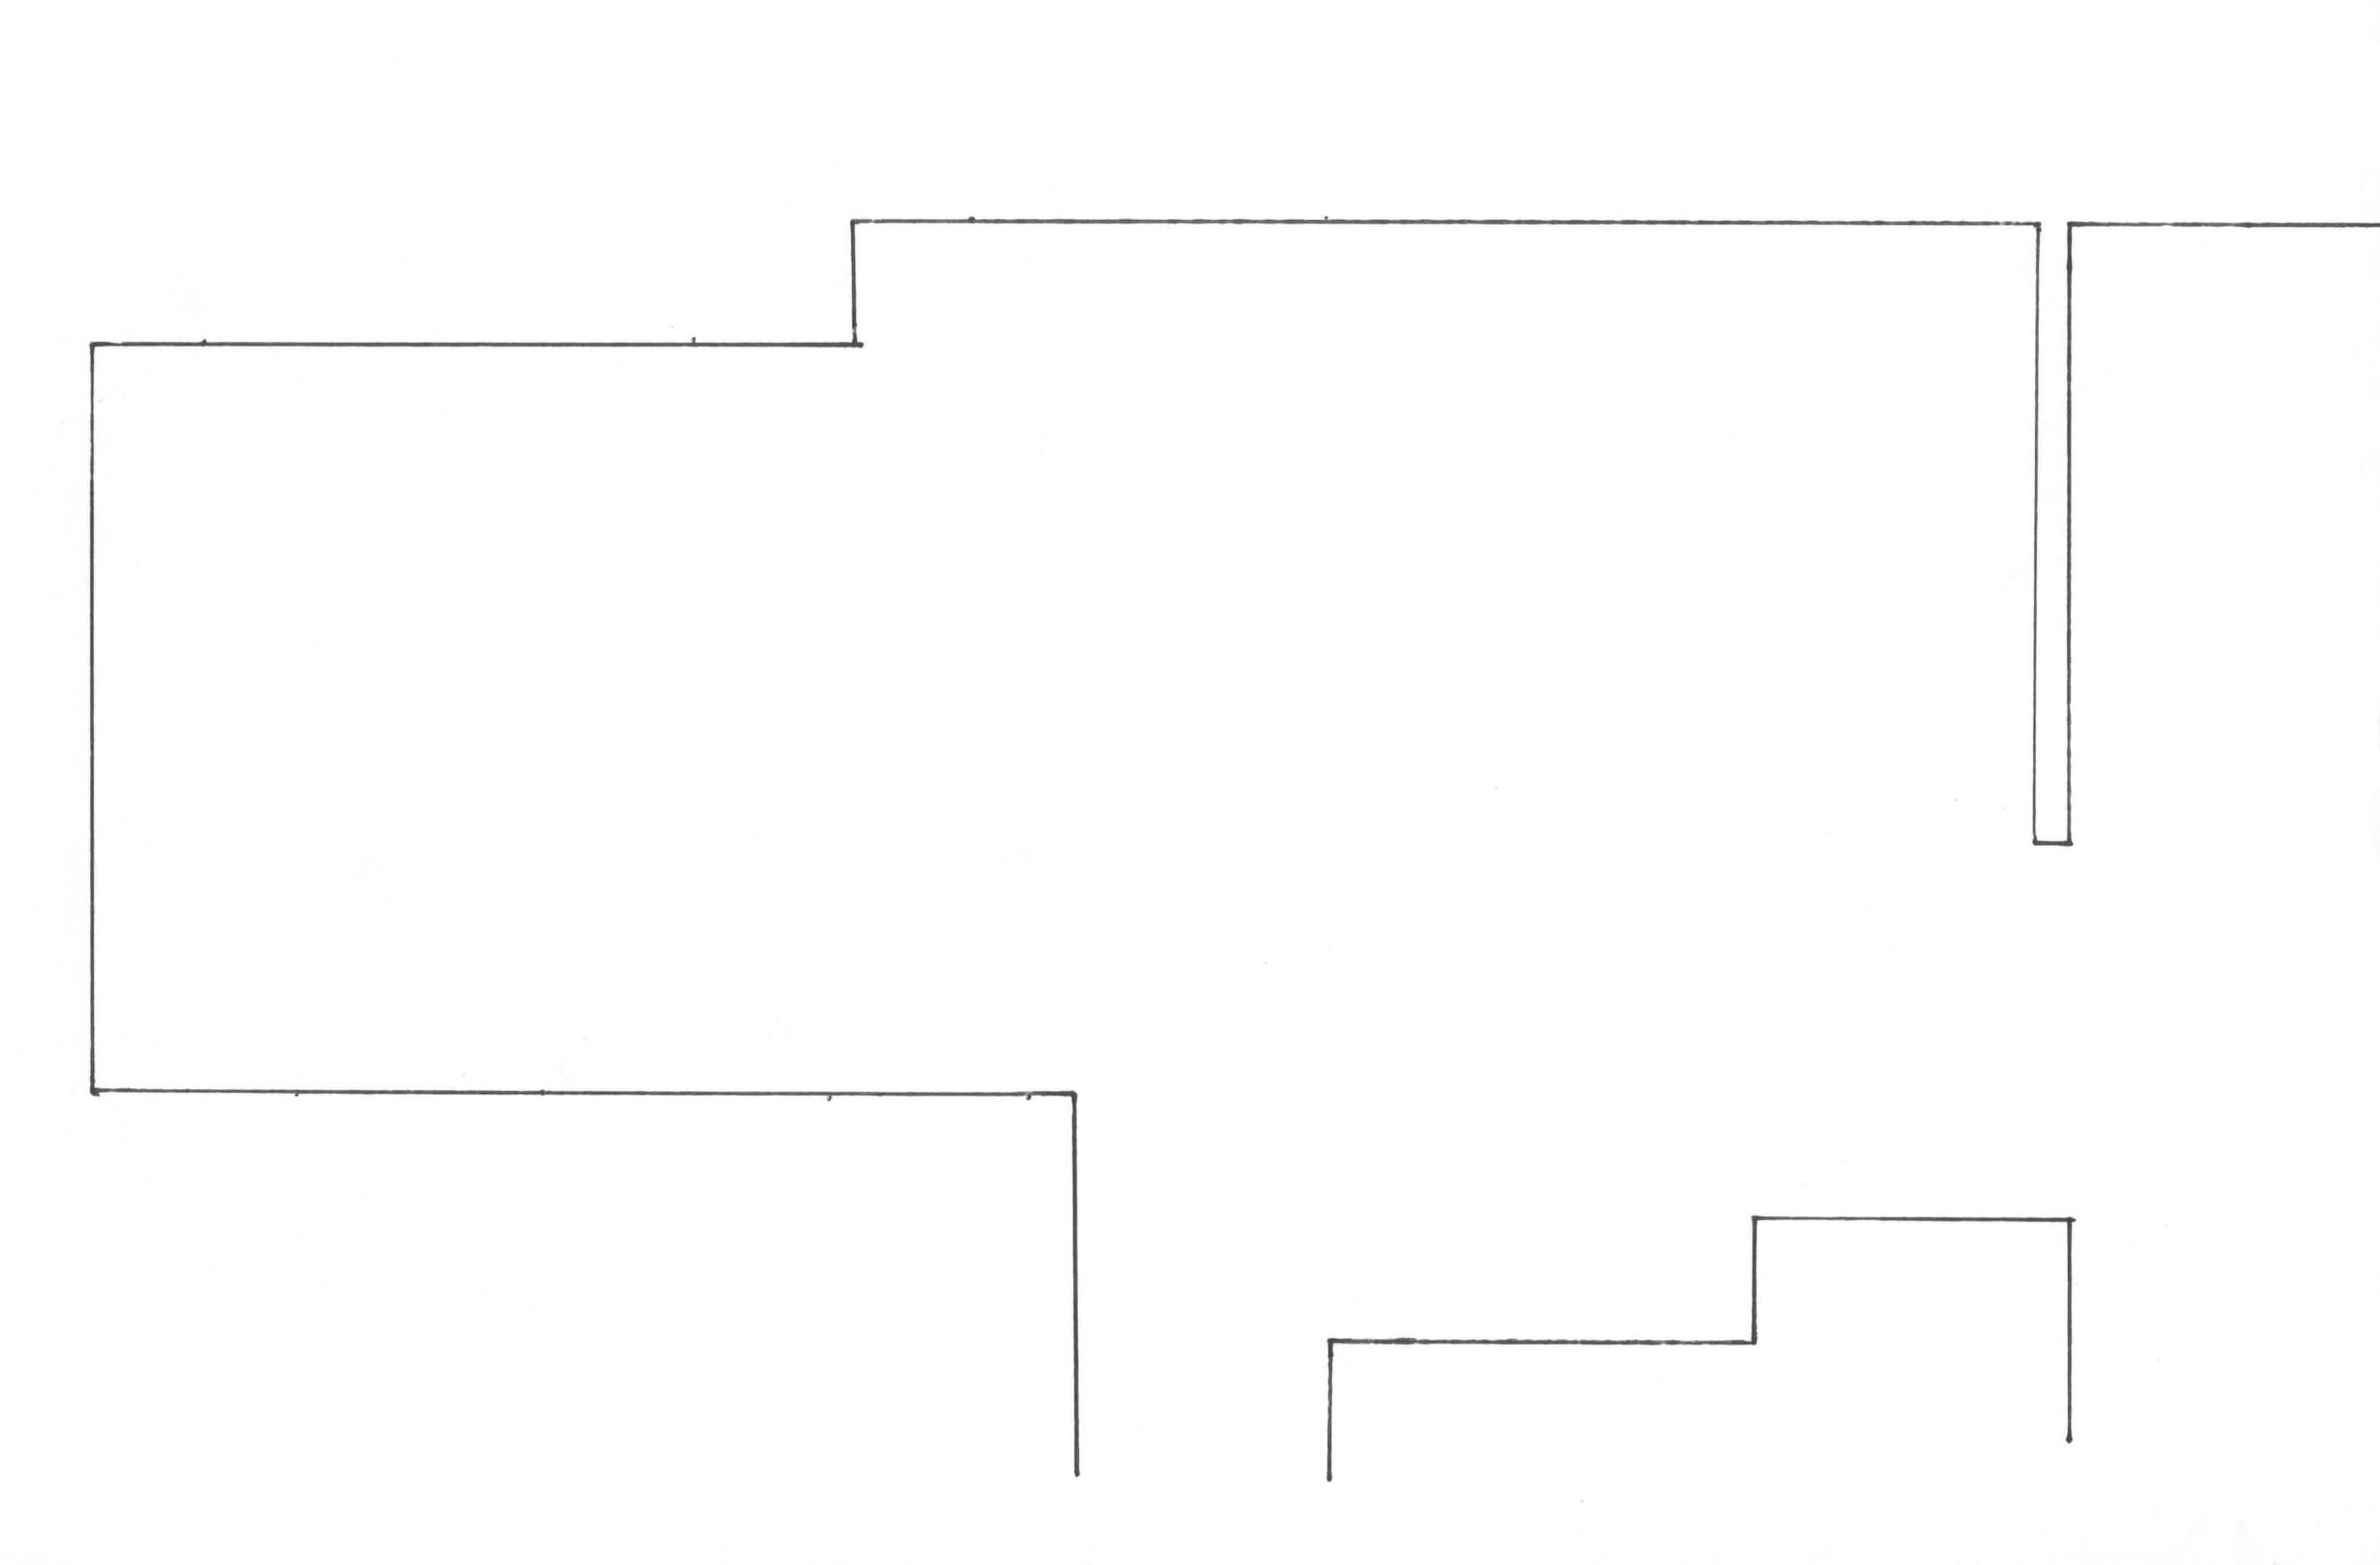
Step 2 – Draw your kitchen layout starting with outer walls and any openings forming a simple outline of the general shape of your kitchen. Please see the example below.
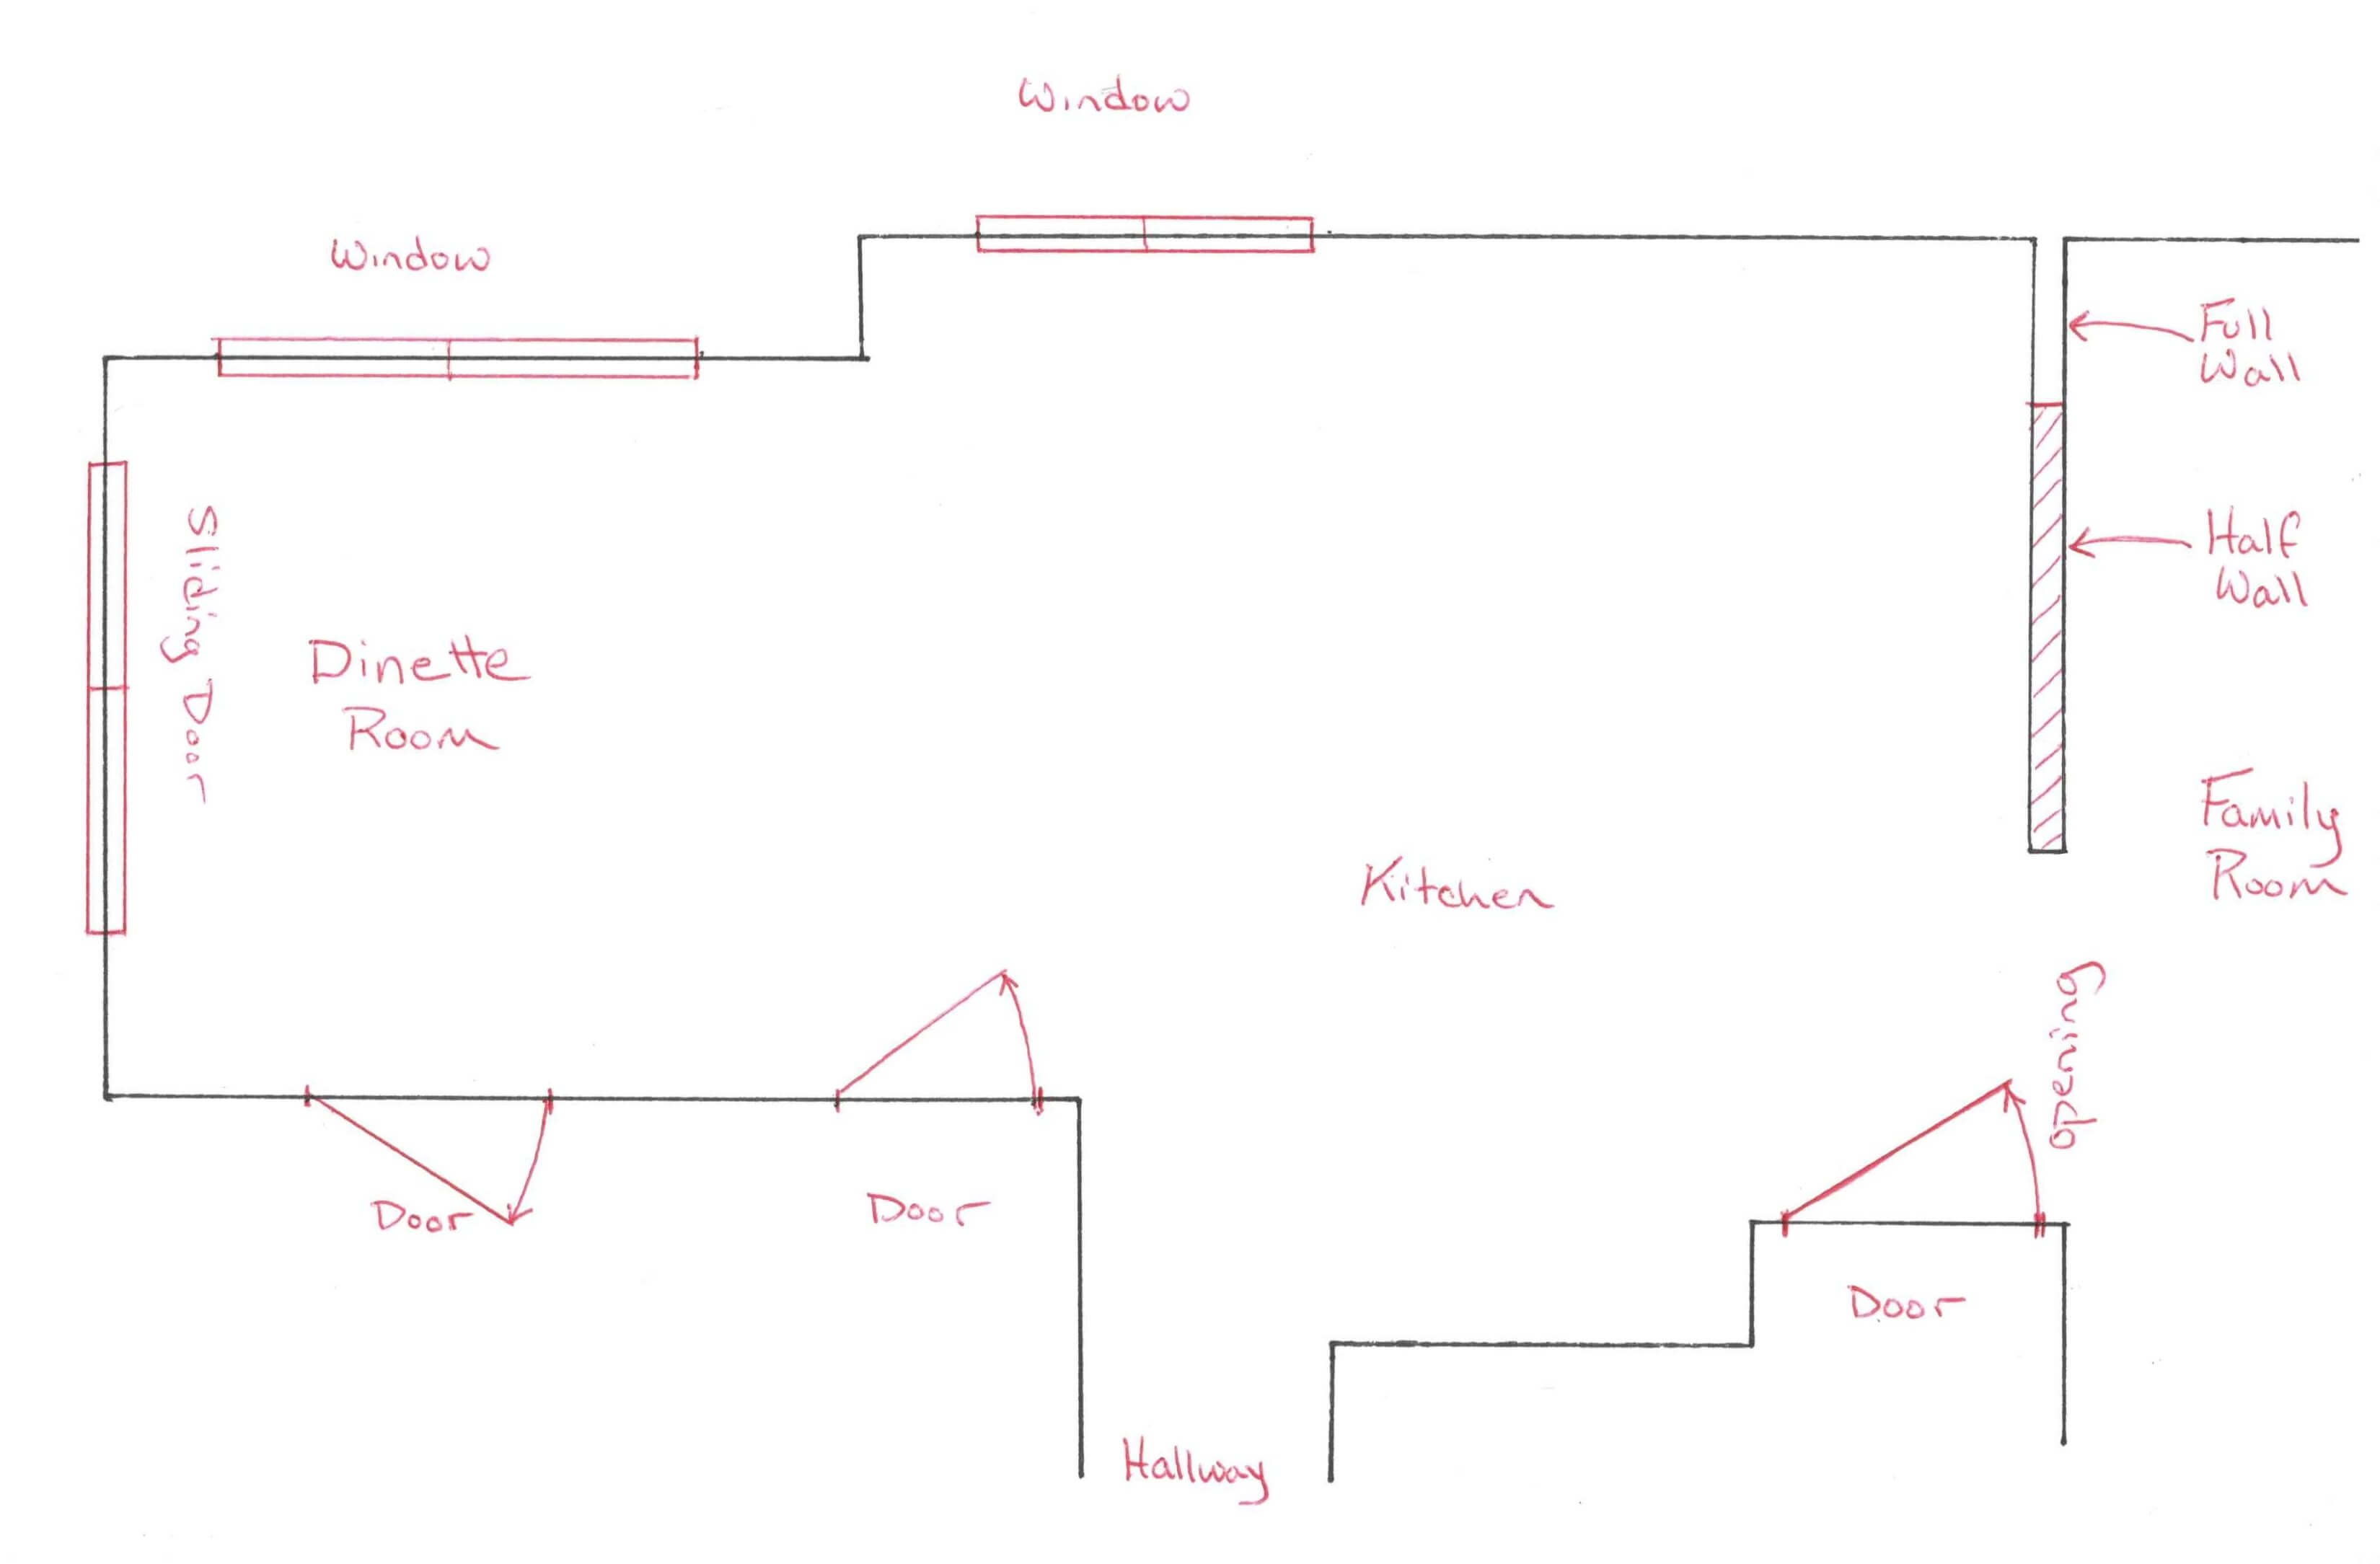
Step 3 – Draw and label all windows, doors, openings, rooms, and any other structural obstruction that could affect your cabinet location. Be sure to include which direction each door opens. Please see the example below.
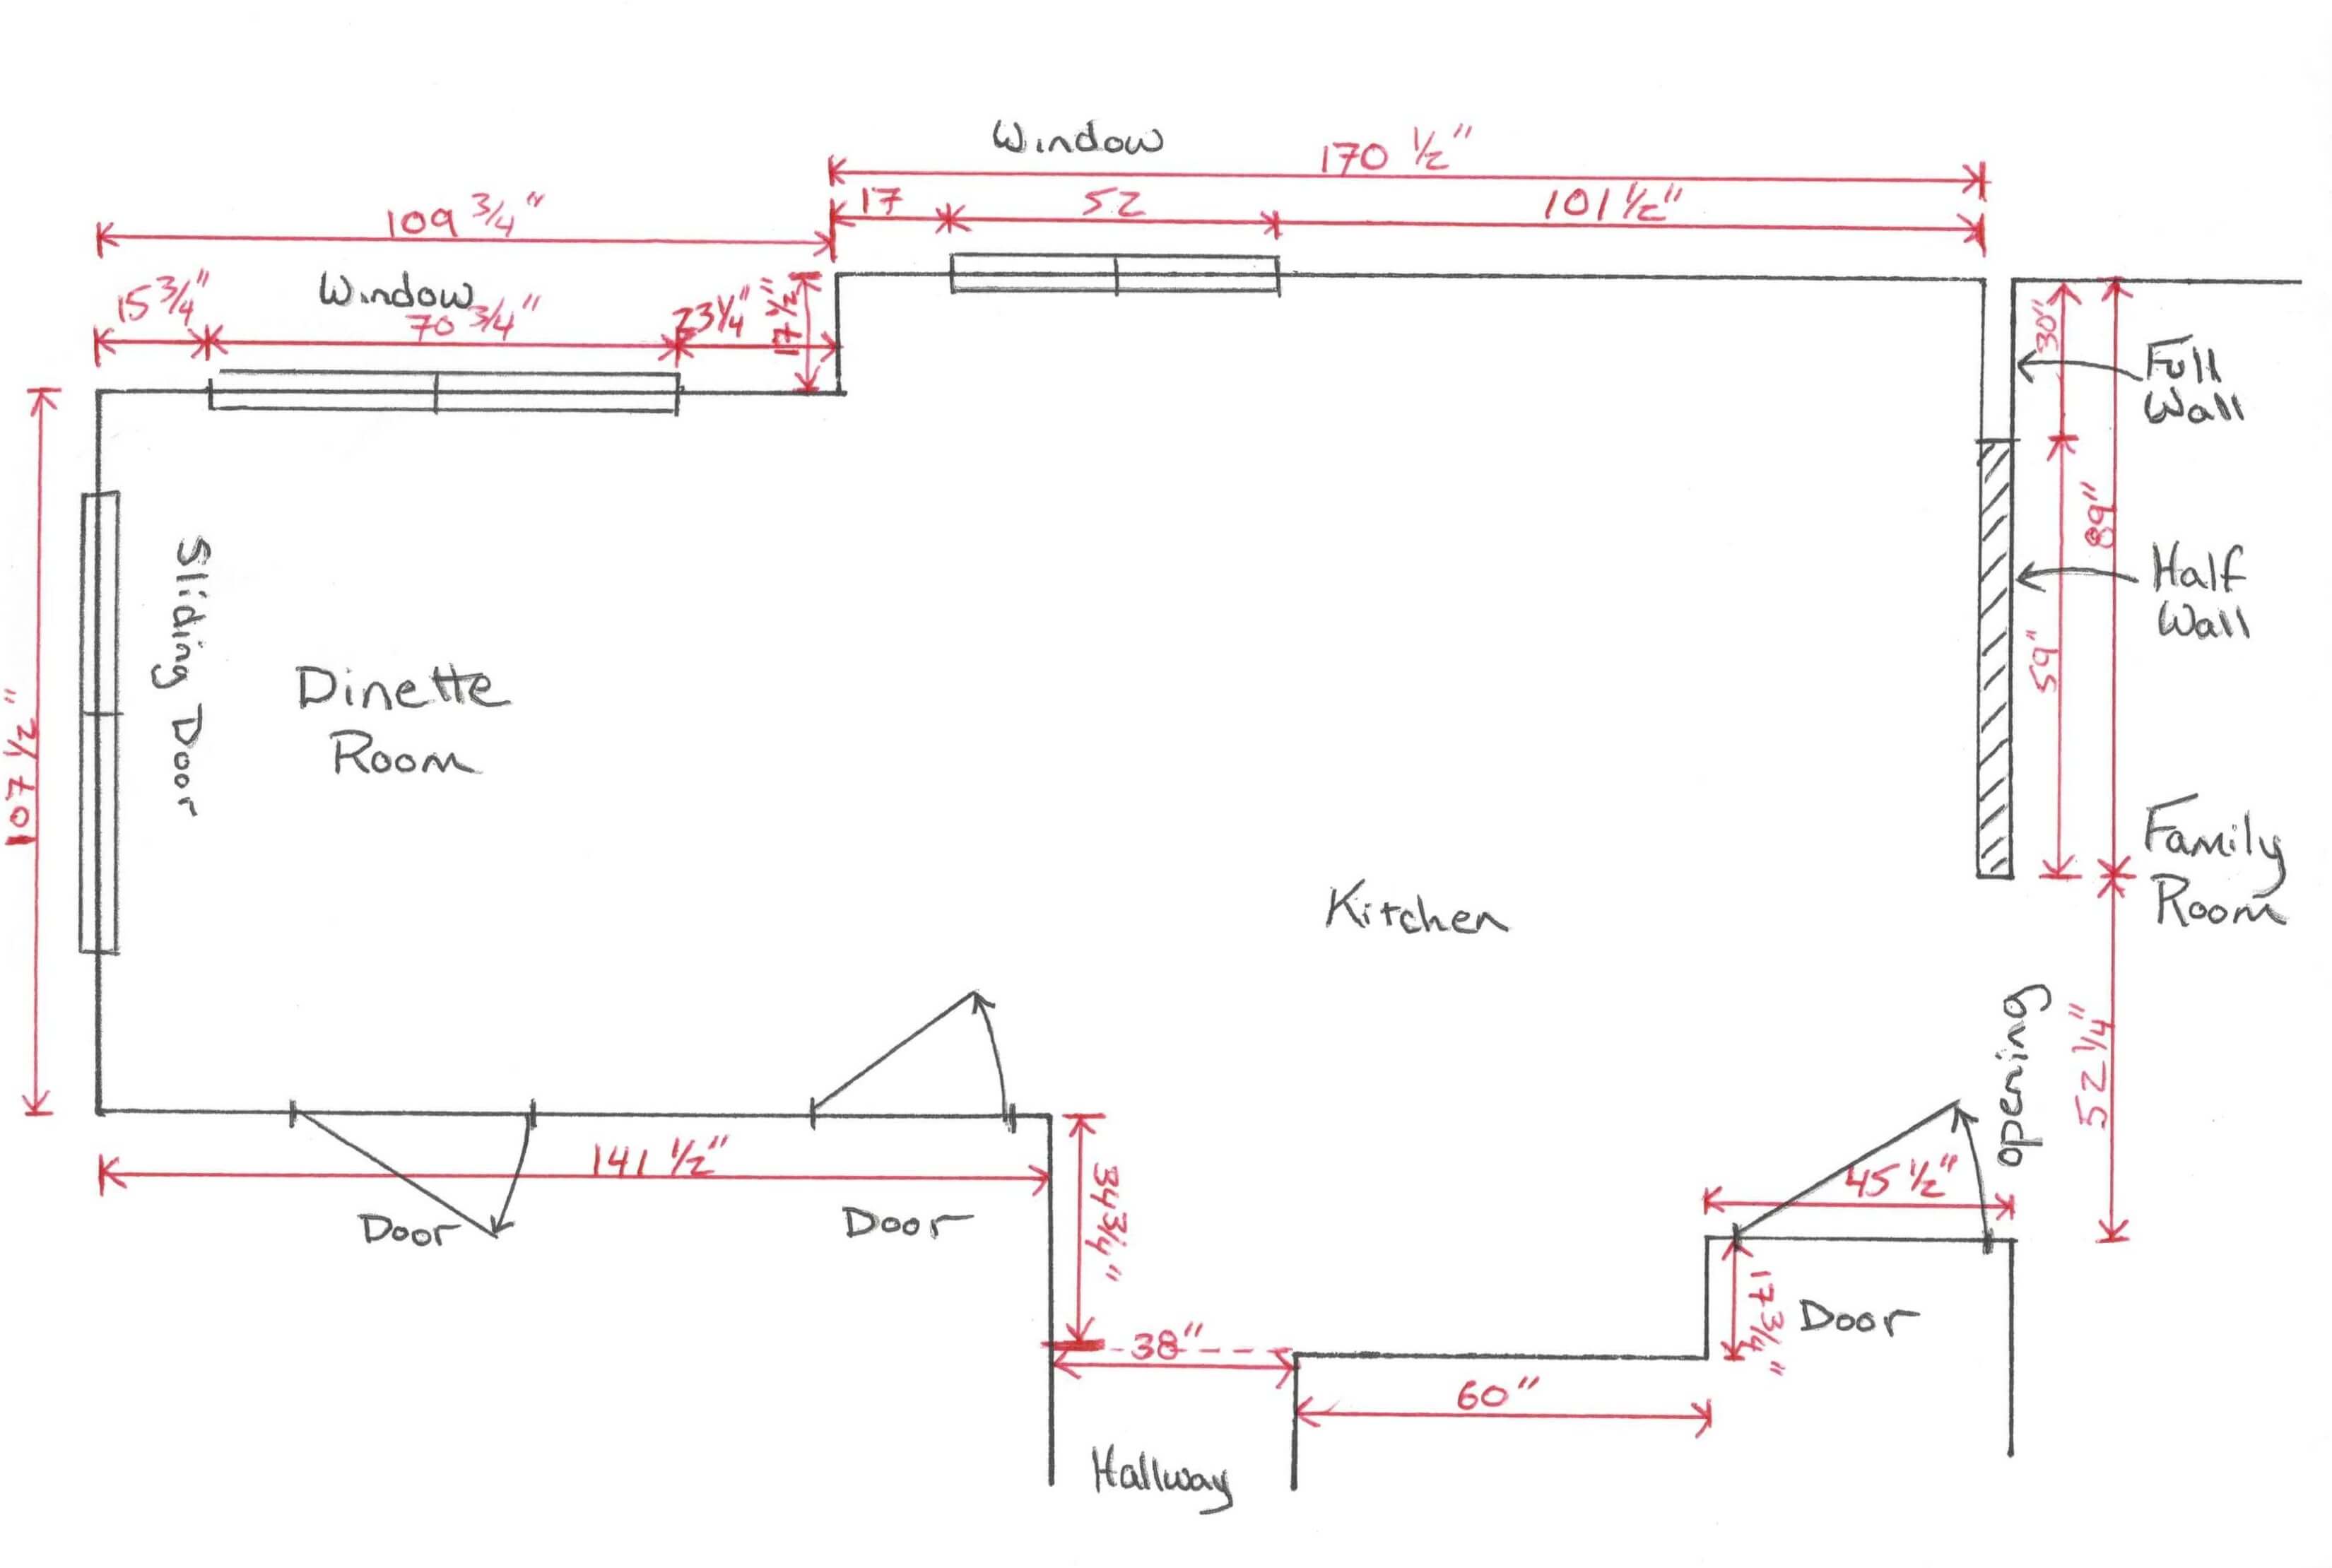
Step 4 – Measure and record all walls, openings, windows, and doorways captured on your kitchen drawing. Start at one location and take measurements moving clockwise around the room only capturing the outer walls and openings. Next, go back to your starting location and take measurements to now include the windows and doors. Be sure to measure from the outside edge of the door and window trim. Check that each outer wall measurement equals the total of all the other measurements with windows and doors included on that same wall. Record your measurements down to 1/4 of an inch (e.g. – 40 3/4”). Please see the example below.
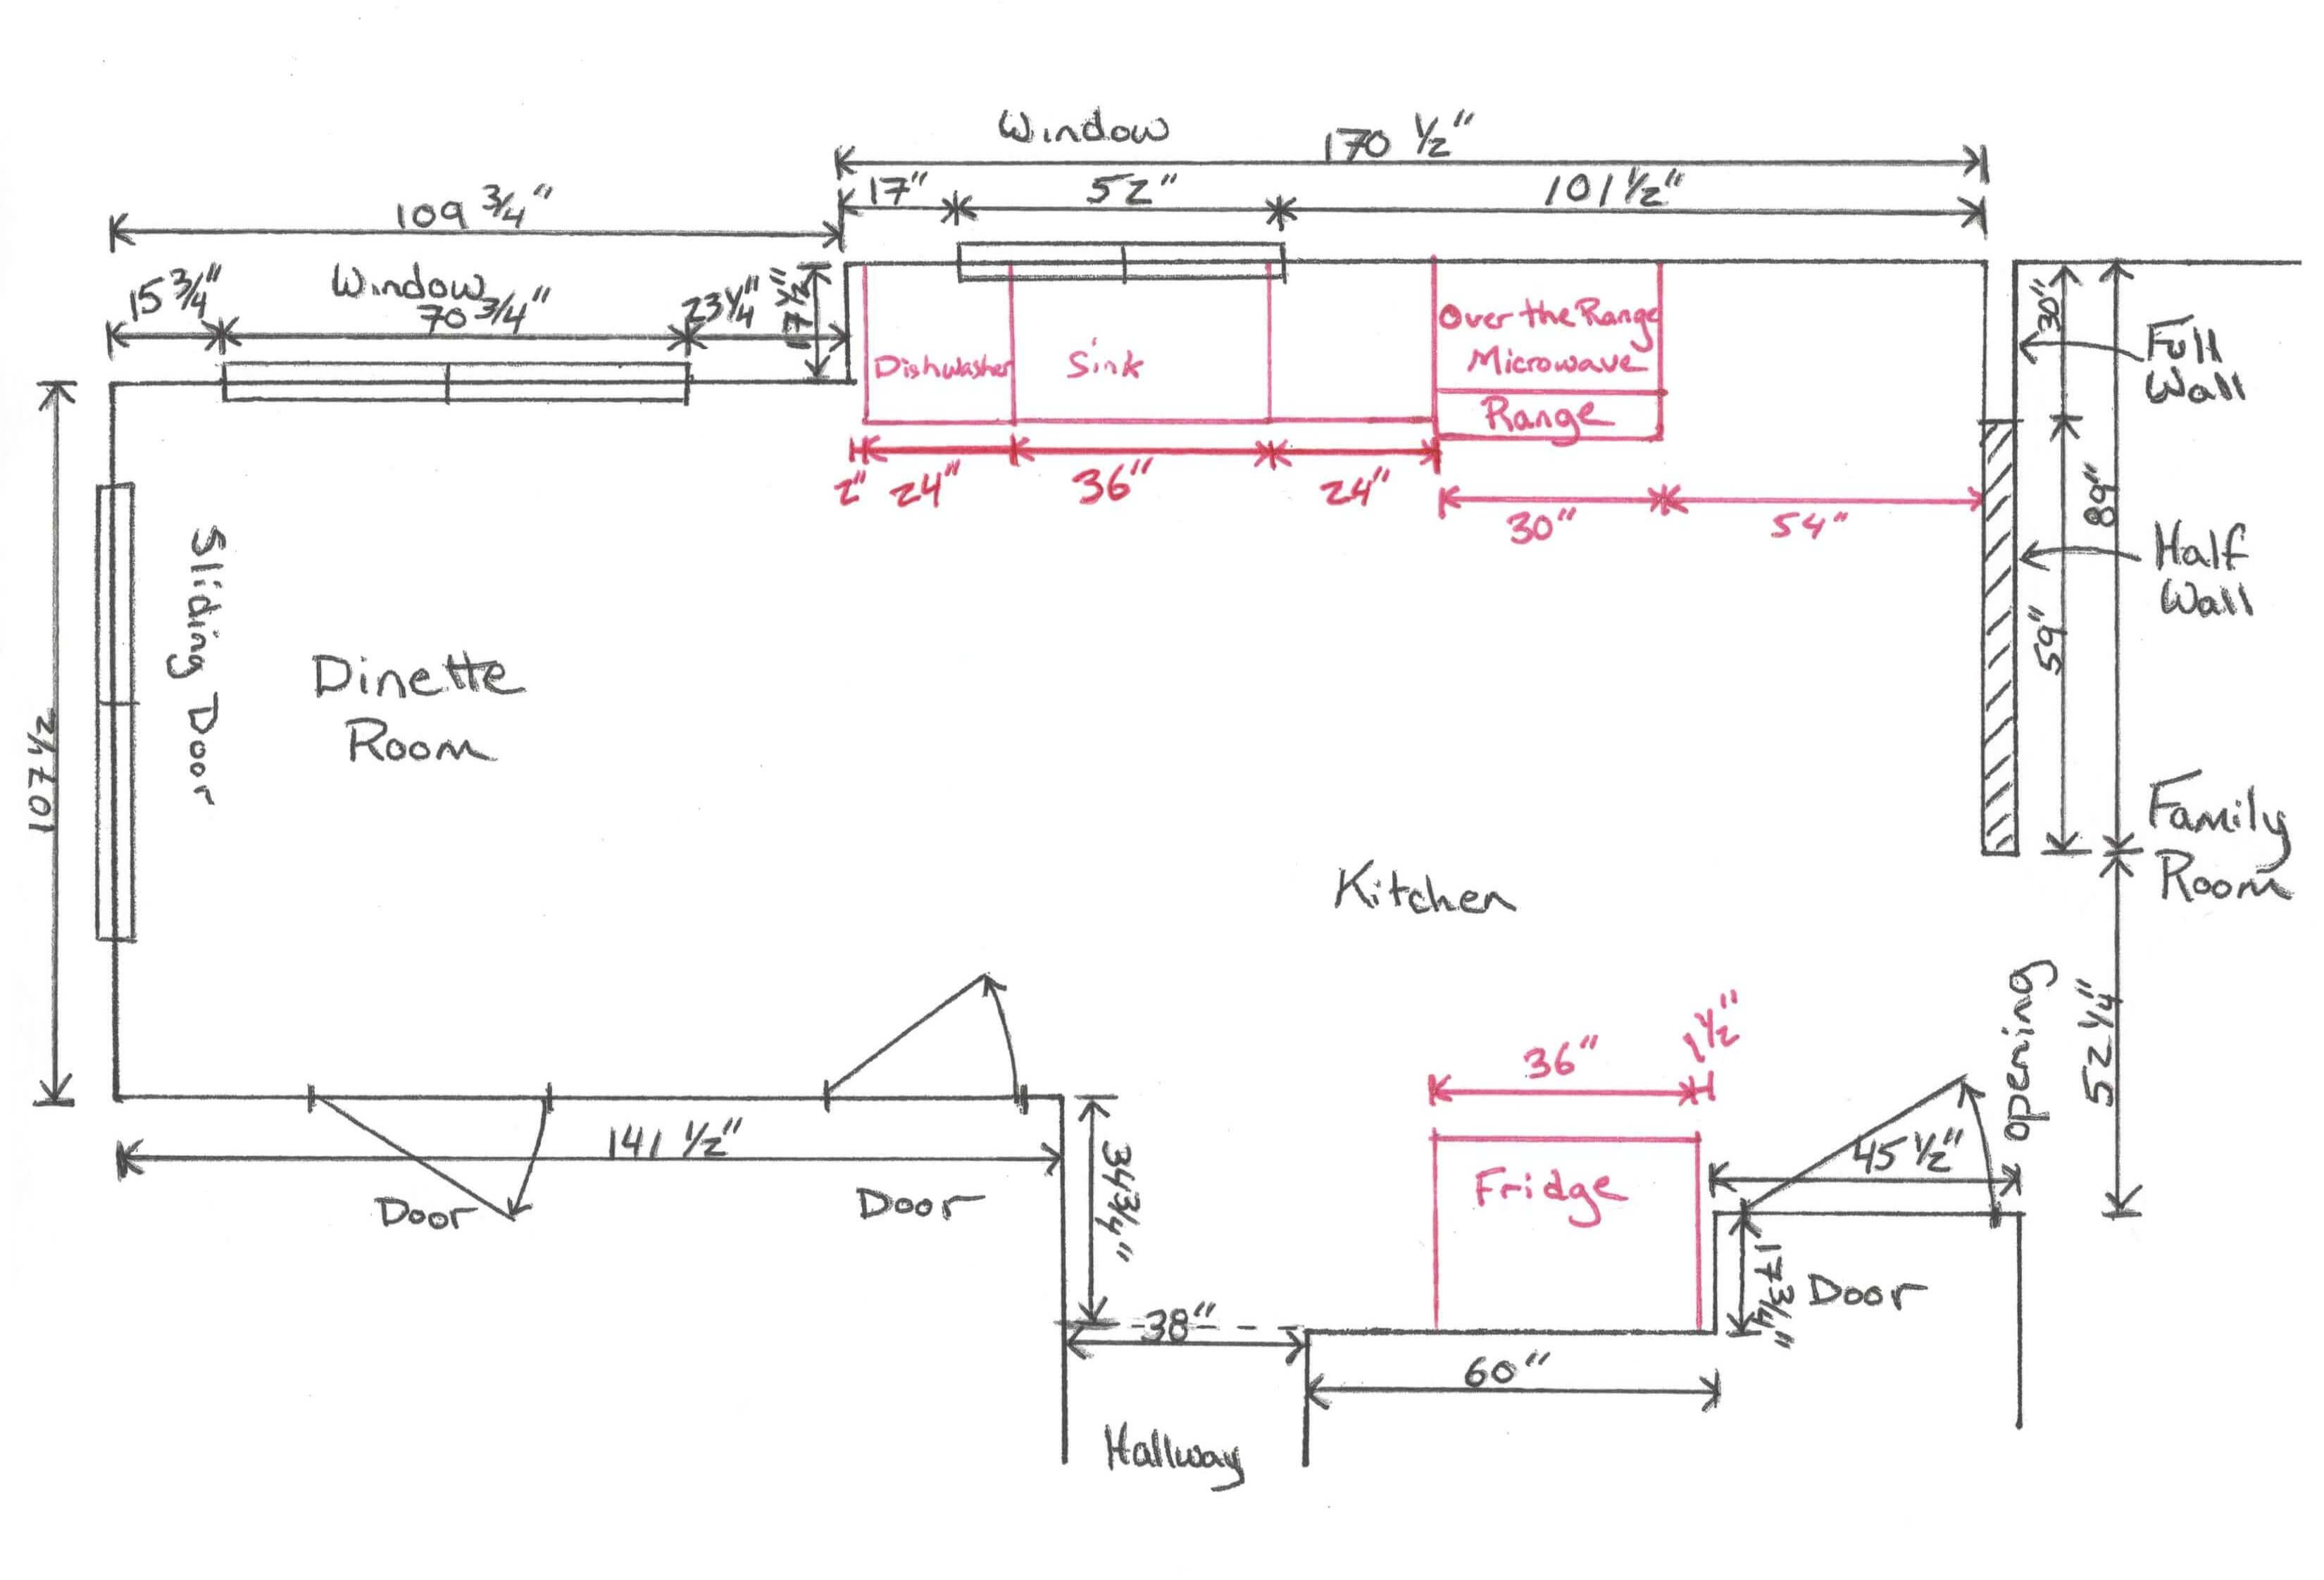
Step 5 – Draw, measure, and record the current locations of the sink, range, refrigerator, and dishwasher. Please see the example below.
Step 6 – Add any other important details and obstructions that would affect where cabinets could be installed such as range hoods, floor vents or radiators, low hanging ceilings, etc. Be sure to include measurements locating any obstructions including height measurements for low ceiling areas. Please see the example below.
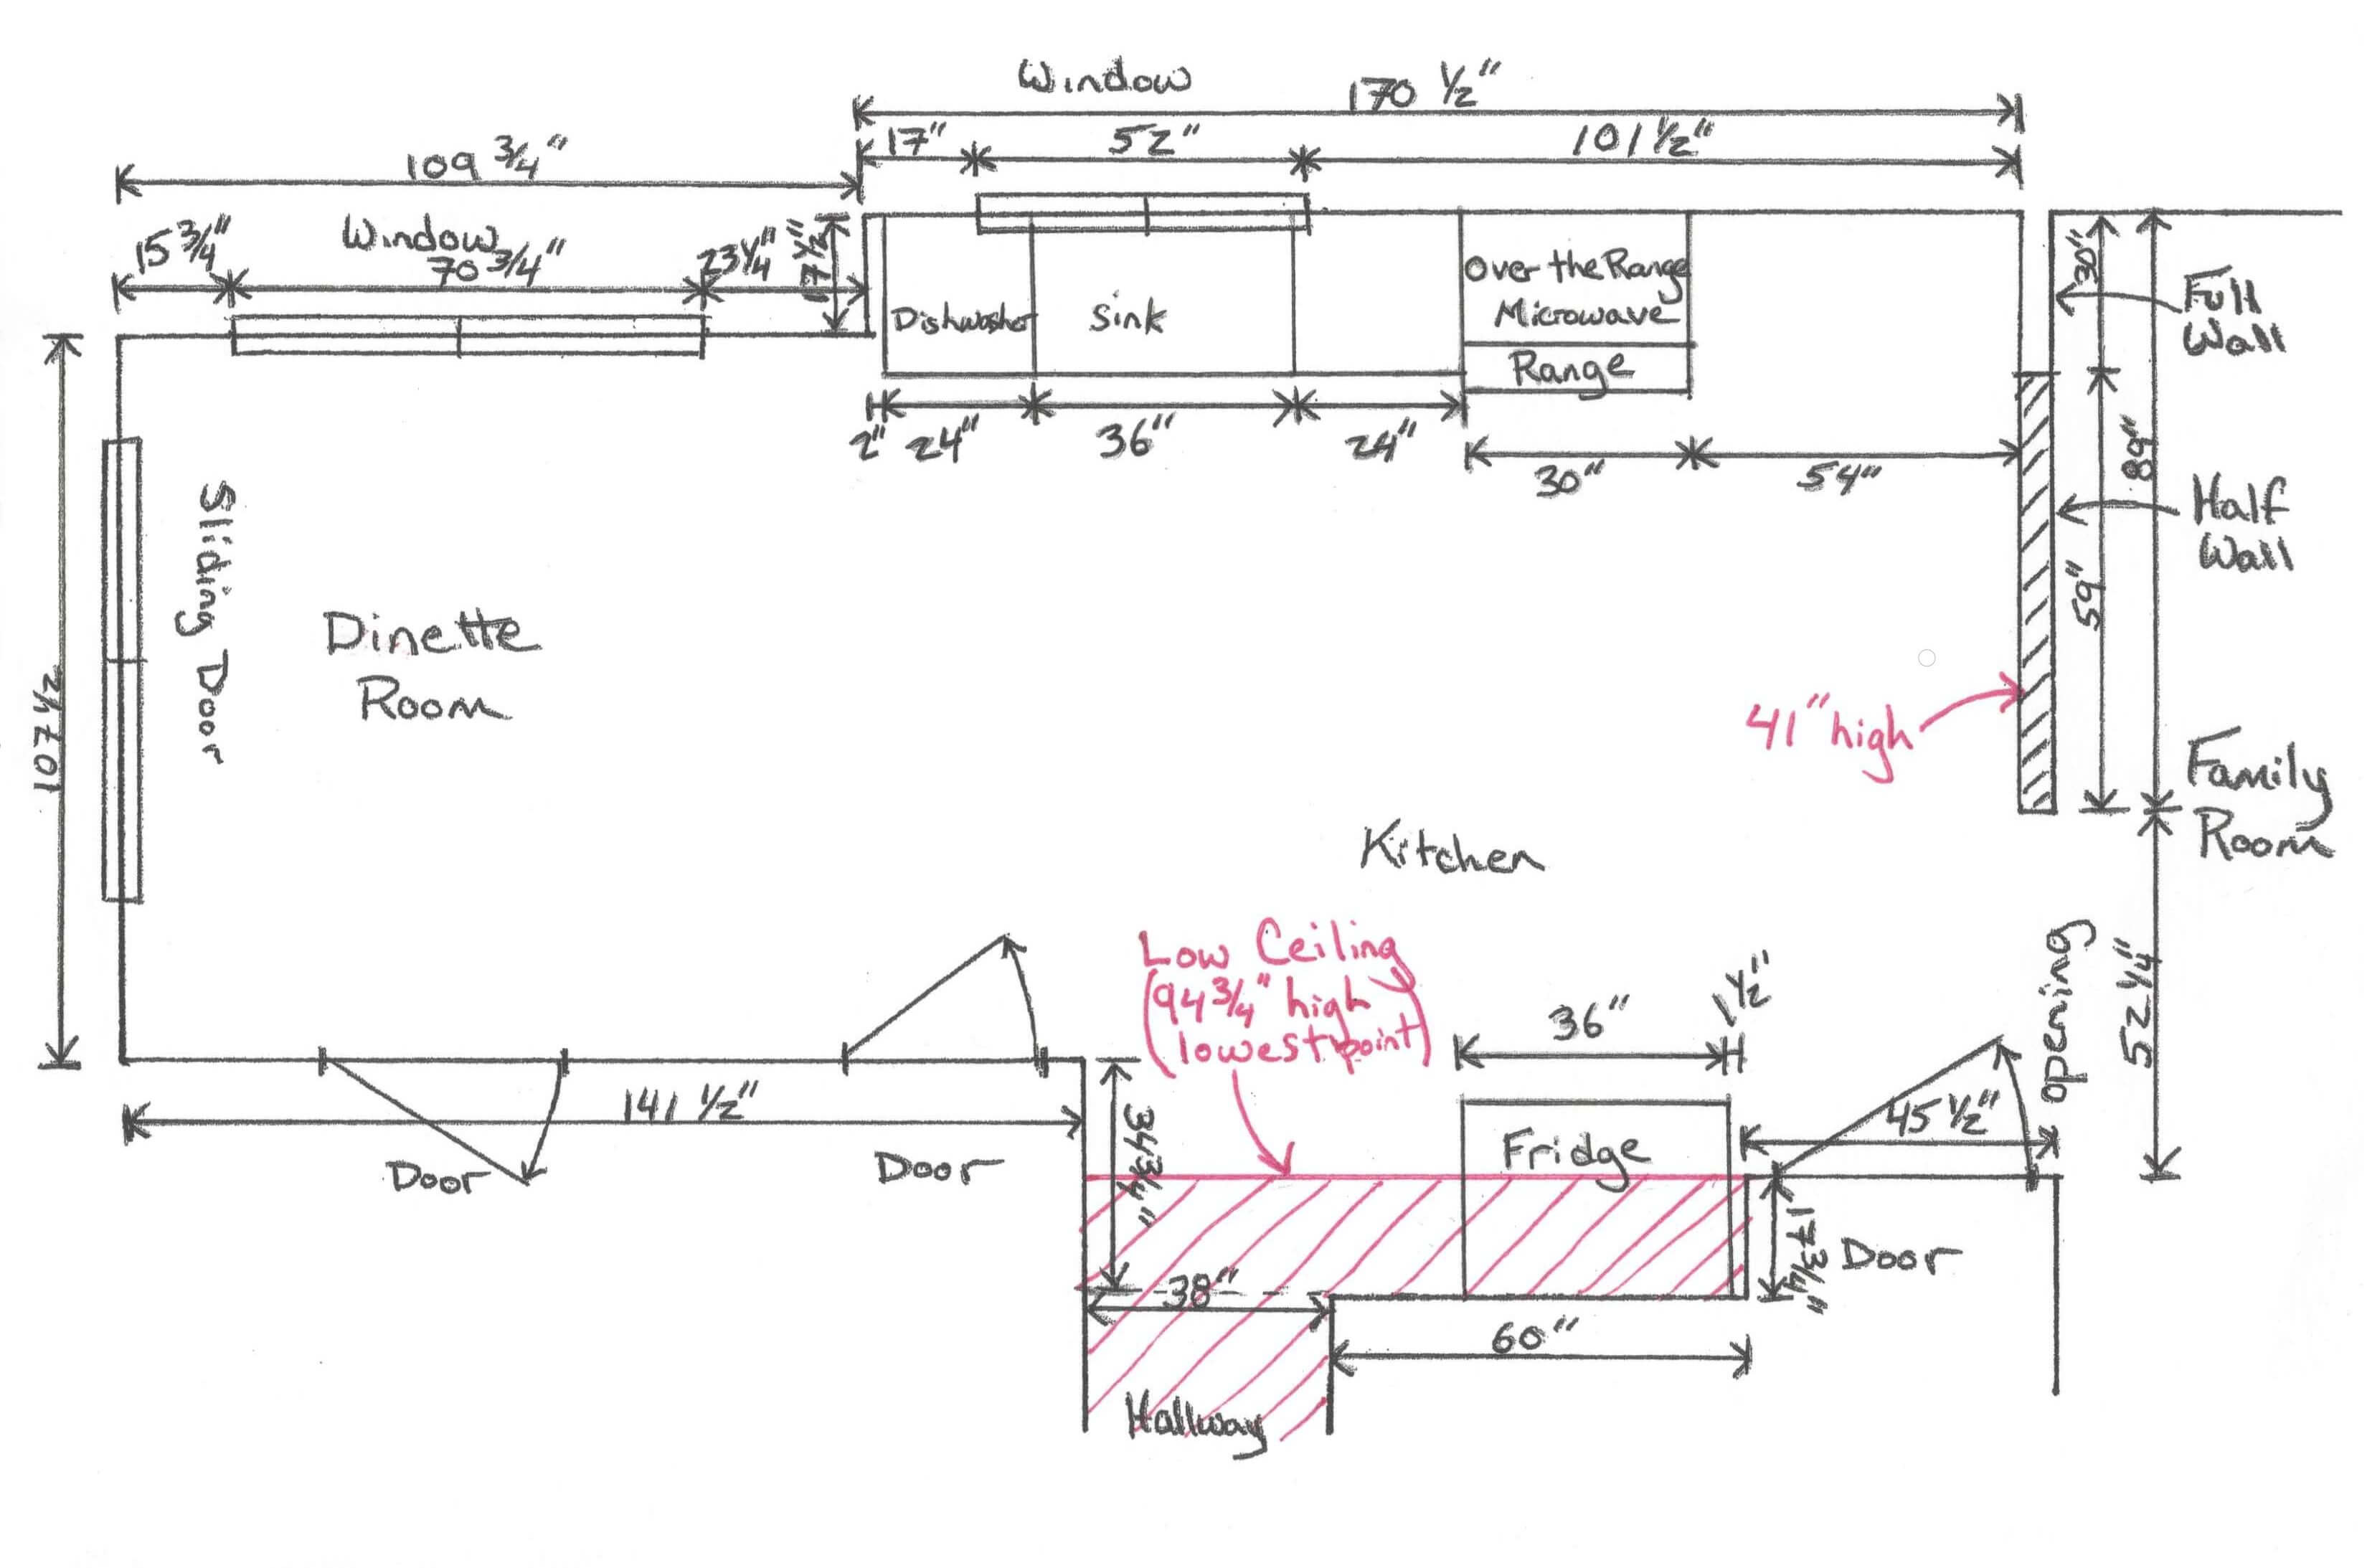
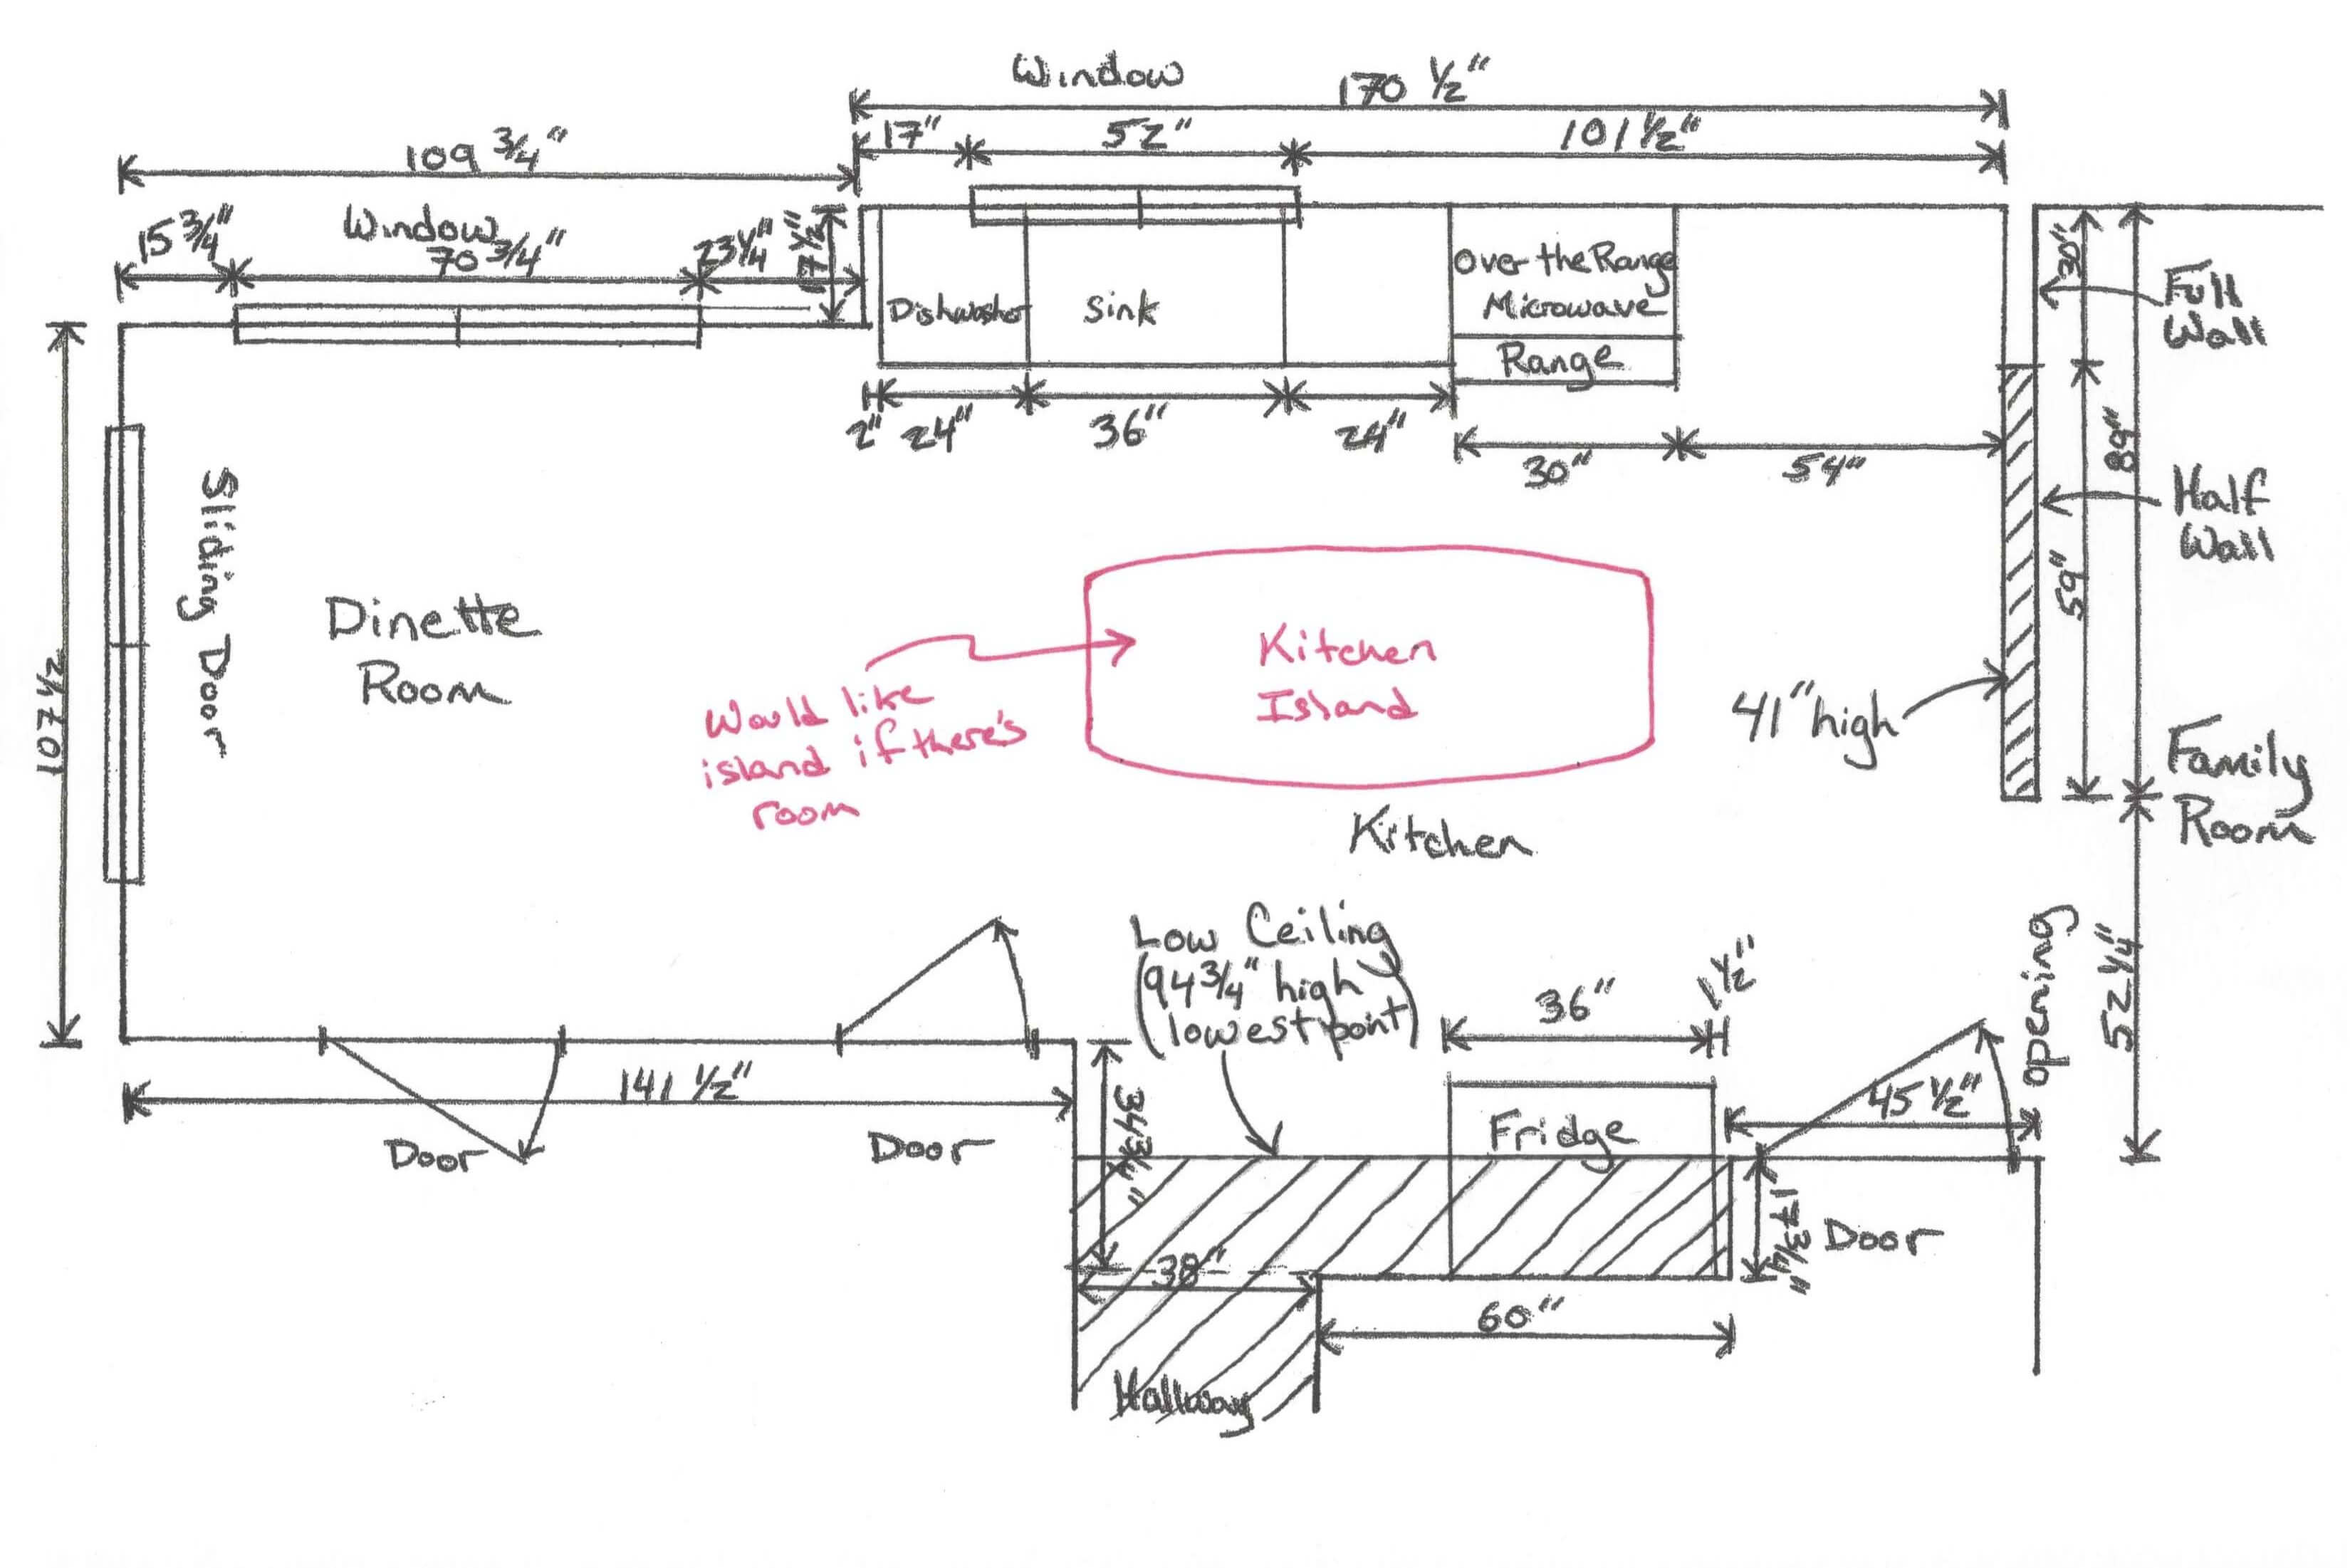
Step 7 – Add any notes that would be helpful to our design team regarding how you would like your new kitchen laid out. Be sure to include any appliance location changes or specific cabinet options. You can either add to the current drawing or sketch a new drawing with your kitchen idea. Please see the example below.
Section 2 – Taking Pictures of your Current Kitchen
Take photos of your kitchen capturing each wall and feature shown on your drawing. It’s also great to include a couple photos of your kitchen as a whole from different locations. Be sure to check and see that your pictures are clear and capture all areas of the kitchen. These pictures are a valuable resource for design and to double check and make sure no additional obstructions or potential issues may have been overlooked.
Section 3 – Tell Us About Your Kitchen
Please fill out the form below. It is best to look at the different cabinet, storage, and accessory options that we offer before filling out the sheet. With the information you provide us, we can help keep you on budget or design around a distinct style using different cabinet options and accessories for optimal functionality and aesthetics.
